(Unity) Intro to Unity : Basic uScript
In your previous tutorial, you downloaded and customized your very own version of Roll-A-Ball–
Awesome! Unfortunately, while we were able to customize the level itself (moving gameobjects around, rotating them, etc), and introduce new textures for a different feel and tone, we were not able to customize and of the game’s logic. It was not possible to, for instance, create platforms that moved up-and-down on their own.
In this 45-minute tutorial, you will discover how “logic” is programmed into a Unity game, and you will both customize and build some of your own logic to change how Roll-A-Ball works!
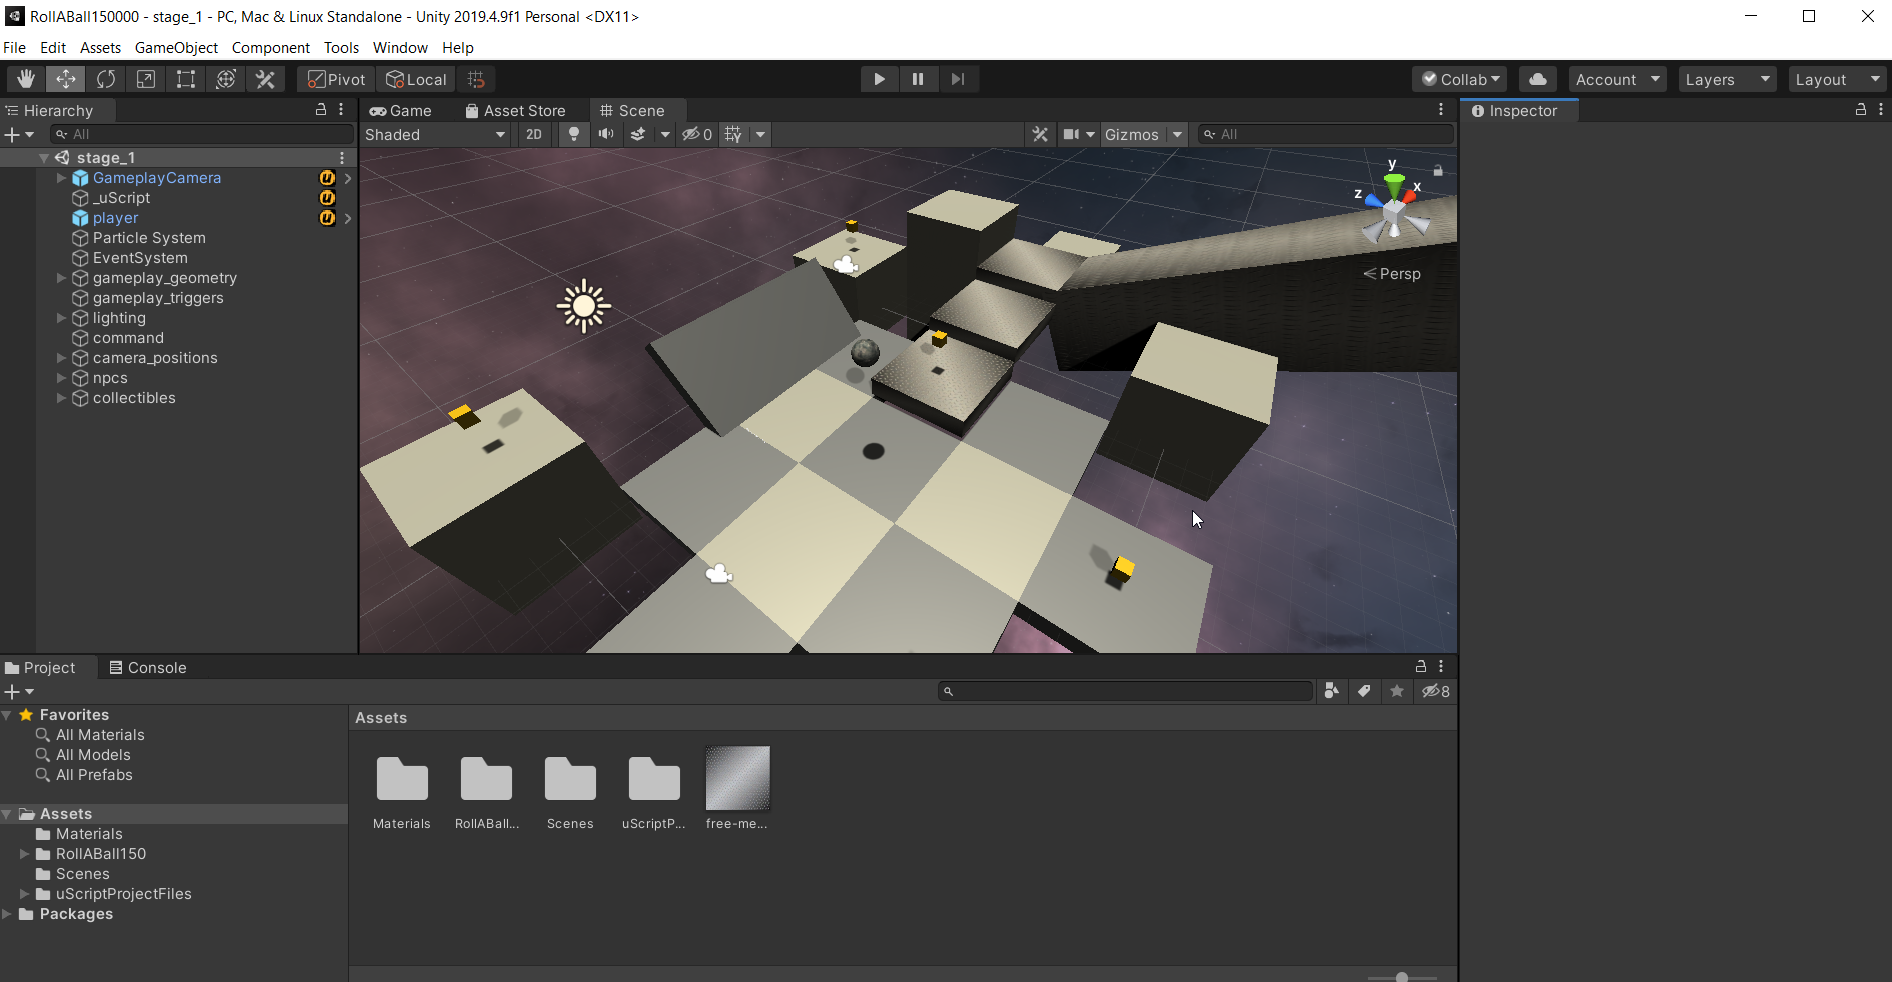
- Open up your Roll-A-Ball project in the Unity Editor.
- Open up the “stage_1” scene–
Creating Game Logic : What are Components?
- If you ever want to understand “How” a gameobject works, what logic it follows, etc, you can view its components in the “Inspector” view on the right–
- To show a particular gameobject in the “Inspector” view, you need to click on it in the “Hierarchy” view on the left.
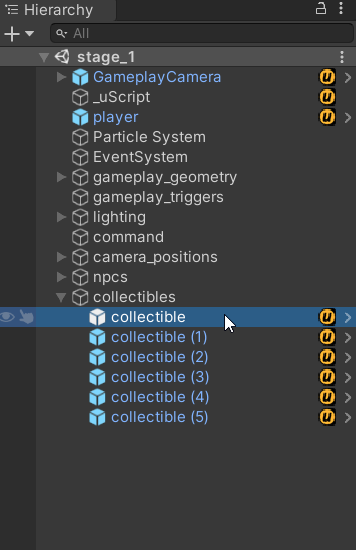
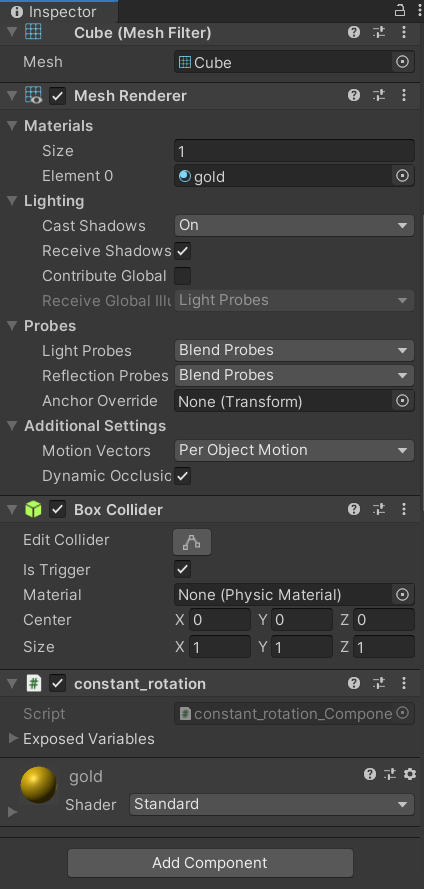
In the inspector view for your “Collectible” gameobjects, you should be able to find 5 “Components”–
These components may be seen above (easier to see if you minimize them as the cursor shows above). They are–
- Transform Component
- Cube (Mesh Filter) Component
- Mesh Renderer Component
- Box Collider Component
- constant_rotation Component
Each one of these components is a little package of code, and each does its part to make the Collectible gameobject work.
For example, the Mesh Renderer Component is responsible for “rendering” (making visible) the cube! If we turn this component off, it disappears–
You may also see that turning off the “constant_rotation” component causes the gameobject to…stop rotating!
In general, if you want a gameobject to “do something”, you need to give it a component. The more components you give it, the more things it can do! Some components already exist for us (given to us by Unity). If you click the “Add Component” button and then navigate to Physics -> Rigidbody, for instance, we can give our collectibles gravity–
(note that we had to change the Box Collider component and remove its status as a “trigger”. Otherwise, it would fall through the floor, as triggers do not collide against anything physically).
- Question : What if there isn’t a component that does what we want? What if we want to create a space-shooter game, and there’s no component for that?
- Answer : We create our very own new component! We can do so by writing code in the form of uScripts!
What is a uScript?
We can create new components using uScript, a visual programming language. Don’t worry if you haven’t programmed before! uScript makes it easier (though still not easy– nothing in game development is).
Let’s “look inside” the constant_rotation component to see how it works. We will be able to see the code / logic that makes our gameobject rotate constantly!
- In the top bar, visit Tools -> uScript -> uScript Editor
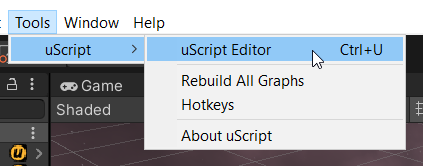
After a few moments you should see a window pop up–
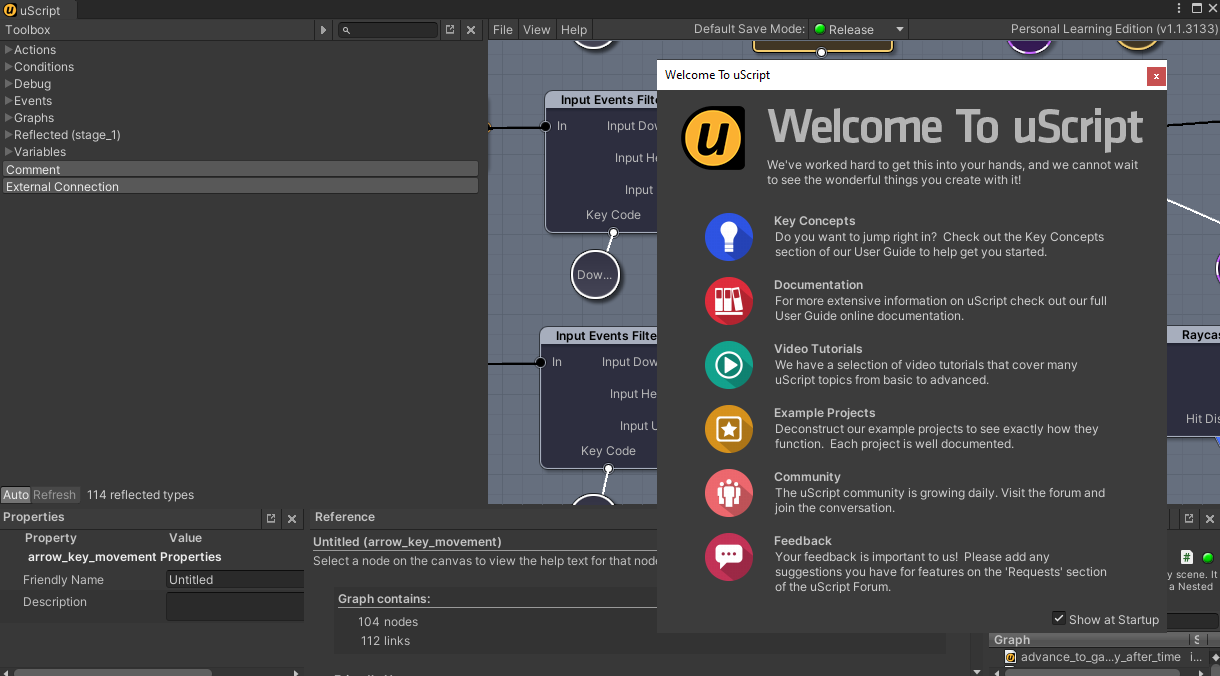
- Exit out of the “Welcome to uScript” popup.
- Load the “constant_rotation” uscript file by following this video.
As seen in the above video, you may move the uScript Graph view around by middle-clicking and click-dragging the mouse (or holding alt and click-dragging the mouse).
NOTE : If you cannot see any connection lines, please follow this video to make them appear. (Mac users will find the “Preferences” menu under the top-bar “Unity” button)
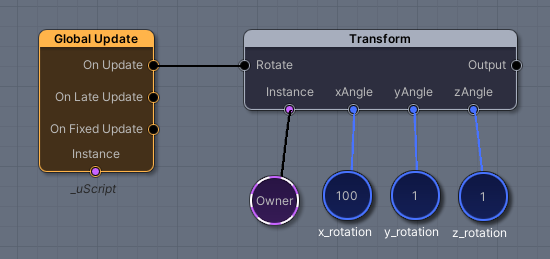
This is the “inside” of the constant_rotation component that our Collectible gameobjects are using–
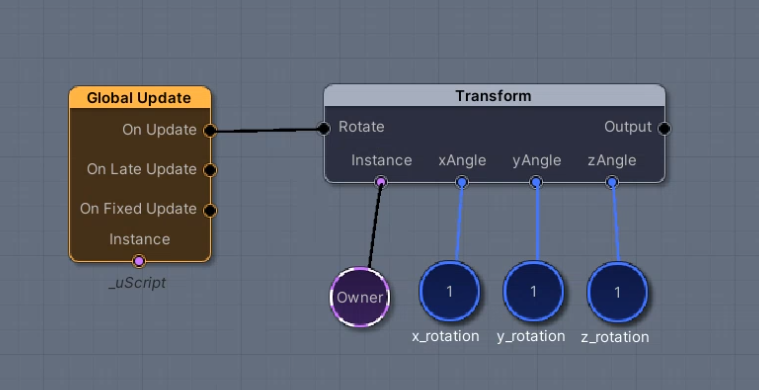
In the picture above, we can see that the constant_rotation component is made of several “nodes” (the block shapes) –
And several variables (the circles)–
And a bunch of lines connecting them all–
Can you guess what they all mean? Go on– take a guess, then read below to get the scoop.
The node on the left has a name– “Global Update”. This node gives us the ability to “detect” when a game update is happening (this happens 60 times per second. Movies update 24 times per second. Photos update 0 times per second, unless it’s an animated .gif!).
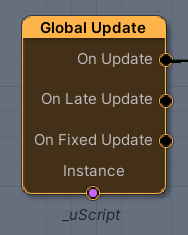
We can “connect” this node to other nodes in order to “do something” 60 times per second. What is our Global Update node connected to?
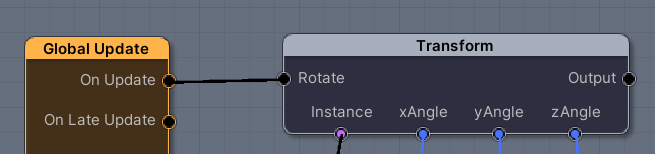
Our Global Update node is connected to a “Transform (Rotate)” node. This second node is responsible for taking a gameobject (specifically, the Transform component of a gameobject), and making it rotate a bit!
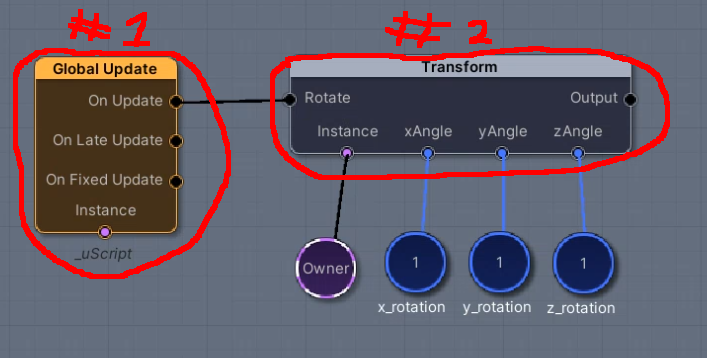
If we look closer at the node, we can see that it has some “inputs” on its bottom side–
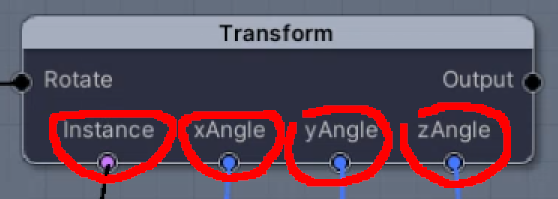
In uScript, many nodes have inputs on their bottom side. These inputs are labelled, and allow us to customize how a node works! We can feed in variables, type-in our own numbers, etc. In this example, the node has four inputs available for us to customize–
- instance : This input is the gameobject (specifically, its transform component) that we would like to rotate.
- xAngle : This input is the amount of degrees we want to rotate the gameobject around the world’s X-axis.
- yAngle : This input is the amount of degrees we want to rotate the gameobject around the world’s Y-axis.
- zAngle : This input is the amount of degrees we want to rotate the gameobject around the world’s Z-axis.
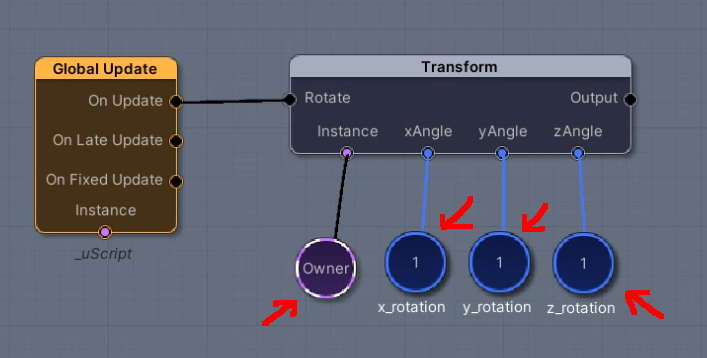
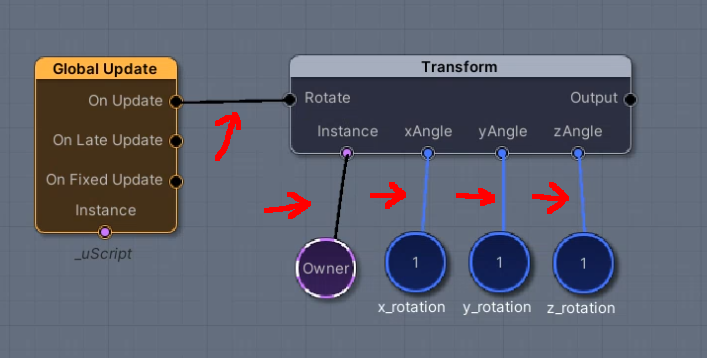
If we zoom out, we can see that variables (circles) are being fed-into these inputs–
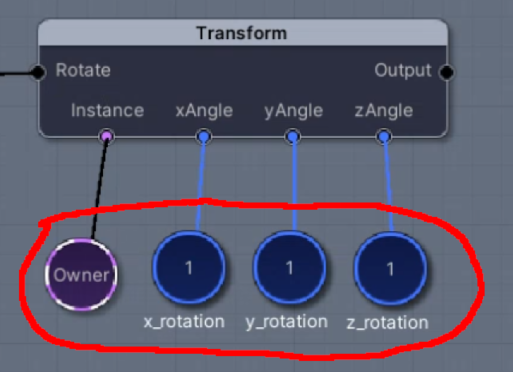
The four variables are–
- Owner : This is a special variable that refers to “whatever gameobject currently has this component”.
- “x_rotation” : This is a variable that stores a number. In this case, the number “1”.
- “y_rotation” : This is a variable that stores a number. In this case, the number “1”.
- “z_rotation” : This is a variable that stores a number. In this case, the number “1”.
If you click on a variable, you can change the number!
(note that we make the variable non-public so that this component won’t use the number we specify in the inspector window under “exposed variables”, which would be 1).
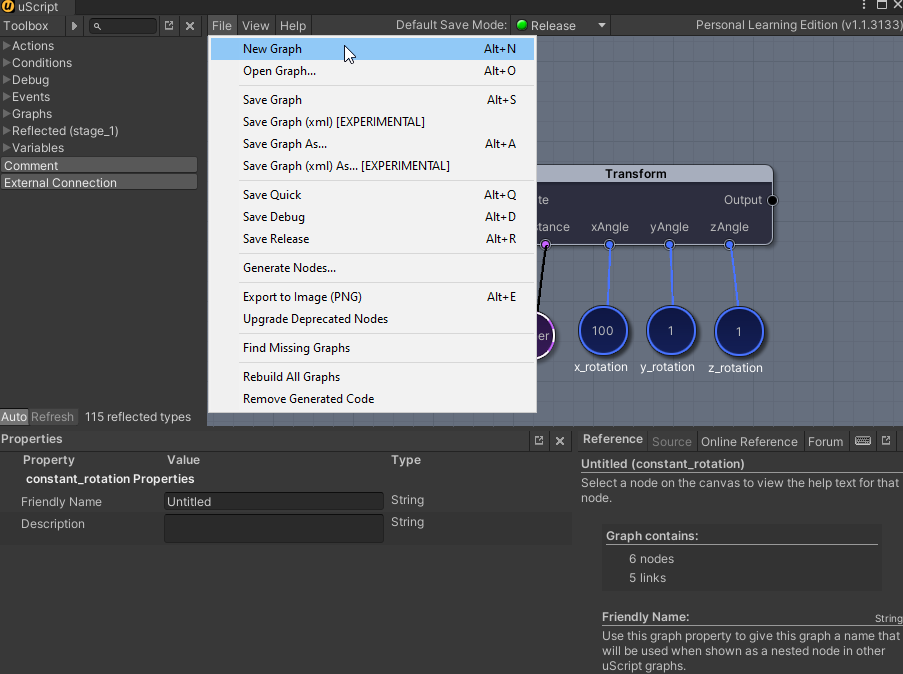
Since we have changed our uScript (and thus changed our component), we should save the uScript–
After a few moments, the save will finish and our constant_rotation component will be updated! It should now work differently if we play the game–
Look at it go! Woooo! (feel free to change the variable back to 1 and save the graph again if you don’t like this).
Do you understand why this is happening?
- Every “update” of the game (60 times per second), the Global Update node executes.
- The Global Update node sends a signal rightward through the connection to the “Transform (Rotate)” node.
- The Transform (rotate) node executes when it receives this signal. It performs a rotation on the gameobject that holds this component (the Collectible gameobject).
- The rotation that occurs is controlled by the x_rotation, y_rotation, and z_rotation varbiables. The former is 100, so the Collectible gameobject rotates 100 degrees in 1/60 of a second.
This explains why the Collectible appears to be rotating so quickly!
If you ever want to change how a gameobject “works”, what its “logic” is, or how it “operates”, you will want to either edit a component via uScript, or create a new one via uScript!
Enough with editing existing components though– let’s create our very own new component!
Create a new Component : Moving Platforms
In this section, we will create a new component that will allow us to move a platform up and down. Here is our end goal–
Very simple, but very useful. Platforming games almost always have platforms that move up, down, left, right, etc.
- In the uScript editor, select File -> New Graph
You should see an empty uScript, with no nodes, variables, or connections–
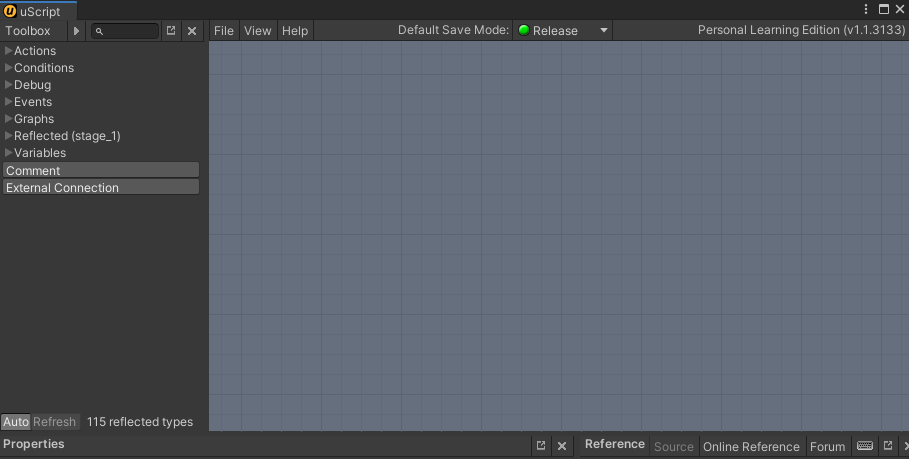
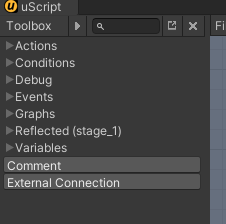
How to create Nodes and Variables? We use the toolbox pane on the left–
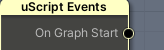
In order to get a signal going, we always begin with an event node. Instead of the “Global Update” node, this time we will use the “uScript Events” node, located in “Events” -> “Game Events”
I encourage you to look through your toolbox, as there are a diverse selection of nodes available! If you’re ever confused about what a node does or how to use it, you may often find an explanation in the reference pane in the bottom-right –

The uScript Events node gives us a signal when the game starts (the “On Graph Start” output)–
- When the game starts, this output will emit a signal, but what kind of node should that signal go to next?
If you explore the toolbox, you can find a section related to “actions”. What kind of actions? How about gameobject-related ones?

You may then click “movement”, then select the “Move To Location” node. You may also find this node (or any node) by typing into the search bar in the top-left–
- Connect the “On Graph Start” output of the uScript Events node to the “In” socket of the “Mode to Location” node. This will allow the Move To Location node to execute when the game begins–

If you save this new component and play the game, nothing will happen sadly– we haven’t provided the Move To Location node its input variables yet!
We want to move whatever gameobject has this component we are making, so we need to create the special “Owner Gameobject” variable. Do so in the toolbox–
As seen in the gif above, “hook up” the owner gameobject variable to the “Target” input. The “Target” input determines which gameobject gets moved by the Move To Location component.
We still need to tell the Move To Location node…
- Where we want to move the target (“End Location”)
- If we want the location to be offset from the Target’s current location (“Use as Offset”)
- And how long we want this transition to take in seconds (“Transition Time”)
Make these specifications as seen in this video.
Let’s test this new component! We should expect any gameobject with this new component to move up 5 units over 10 seconds.
- Click File -> Save Graph.
- Name the new component “move_up_and_down”
- When a popup appears, select “no”–

(selecting “no” allows us to decide which gameobjects have our component. We will add the new component ourselves).
- Add the new component to a gameobject of your choice. For the purposes of your assignment, make it an obvious one so the grader can find it and give you your points!
Play the game.
Hurray! Whatever gameobject you placed this new component on, it should move up slowly for 10 seconds.
However, we need the component to make our gameobject return downward, and then up again, and then down again forever!
Return to the uScript Editor window. Use copy-paste to quickly create another Move To Location node. Connect the two, and tell the second node to move DOWN 5 units, instead of up (as seen in this video).
As our code gets more complex and confusing, we need to utilize a good coding practice– the use of comments!
Let’s comment our code! On the uscript graph, right click empty space and select comment, then type into it to leave a helpful message!
It is good practice to “document” your code and logic by leaving helpful comments. If your teammate sees these, they will be able to understand what you were trying to do. If you forget how your code works one day, your comments will remind you!
Currently, our new move_up_and_down component will make the gameobject move up and down once, and then it will end. In order to make this continue on forever, we must use a famous programming concept– the “loop”!
In order to create a loop, we simply create a loop in our graph (using a bit of help from the “pass” utility node, so our lines aren’t too messy. Watch this video!
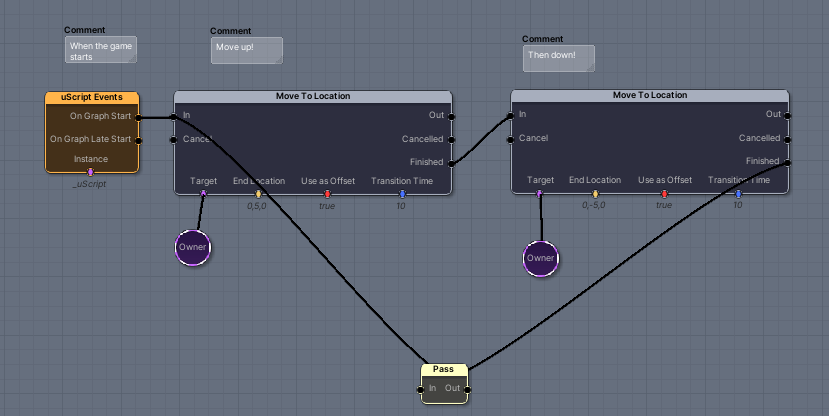
The new “pass” node does nothing– it simply sends the input signal out again without changing anything. It’s main purpose here is organization.
With this loop established, you can see how the “Finished” output of the second Move To Location node feeds into the “Pass” node, then back into the first Move To Location node, thus guaranteeing that the signal will keep these nodes executing forever!
- Save this uScript graph / component (File -> Save Graph) and then play your game again!
Hurray! You now have your very first floating platform! You could use this to create more interesting level designs in your game!
In fact, since you created a new TYPE of component (the new “move_up_and_down” type of component), it is possible to give this component to many different objects, including powerups–
And more platforms–
If you wanted to create a haunted object, such as a haunted chair, you could make it float by giving it this component.
For your assignment, you must create an even more interesting component– a move_in_square component. You can create this component by re-using your nodes and general logic from the move_up_and_down component, though you will need to use a few more nodes. Good luck!